[:en]
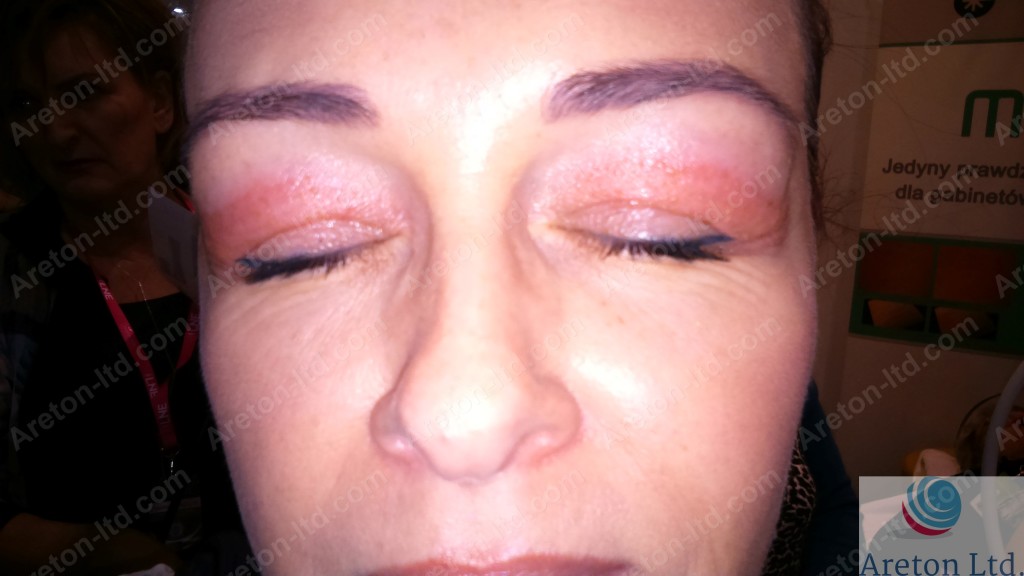
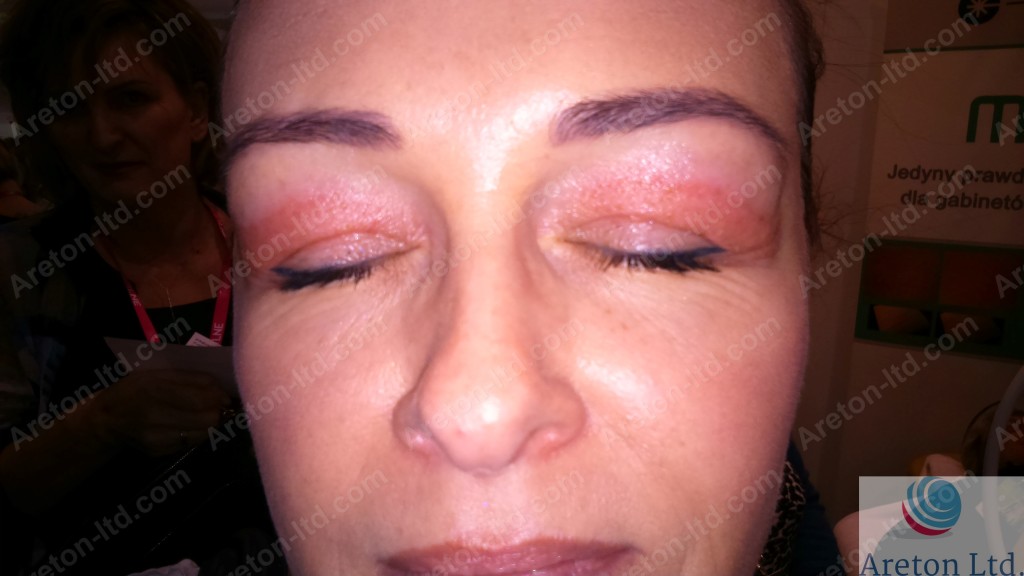
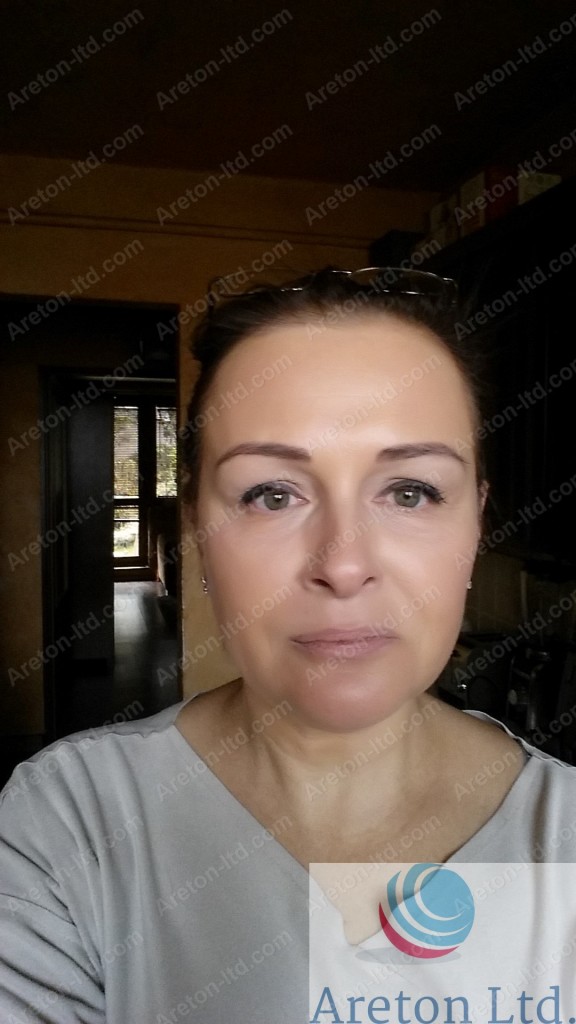
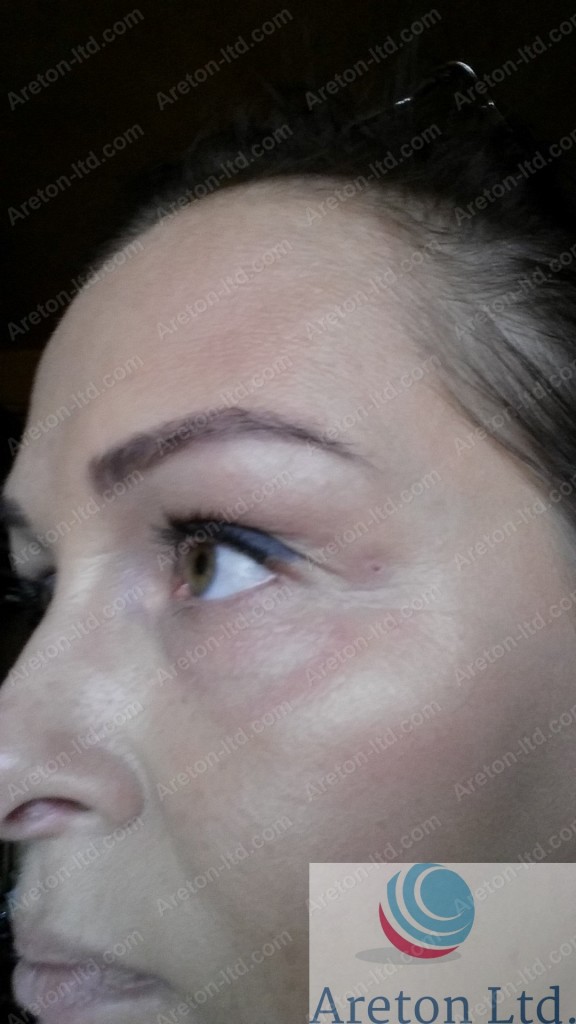
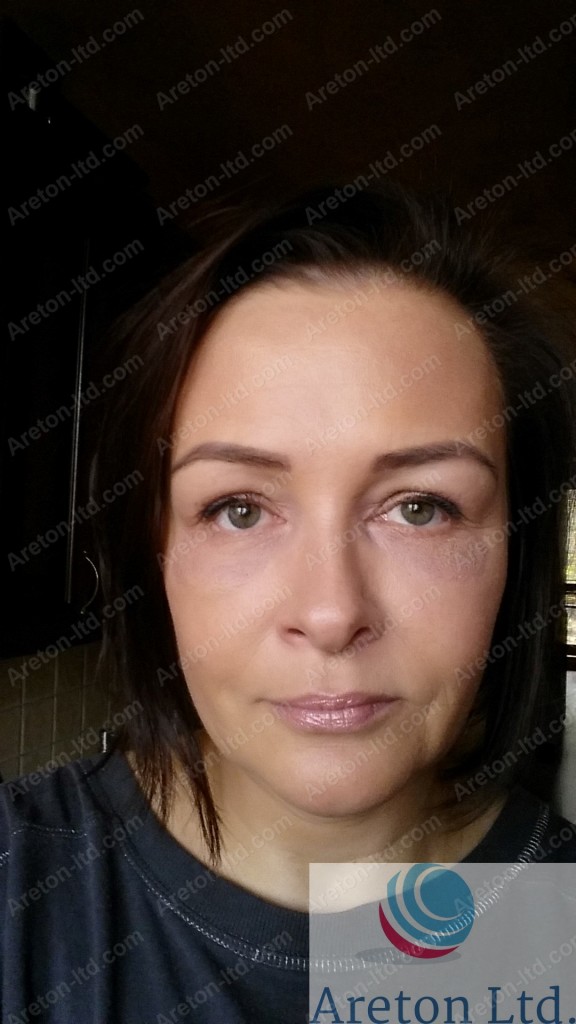
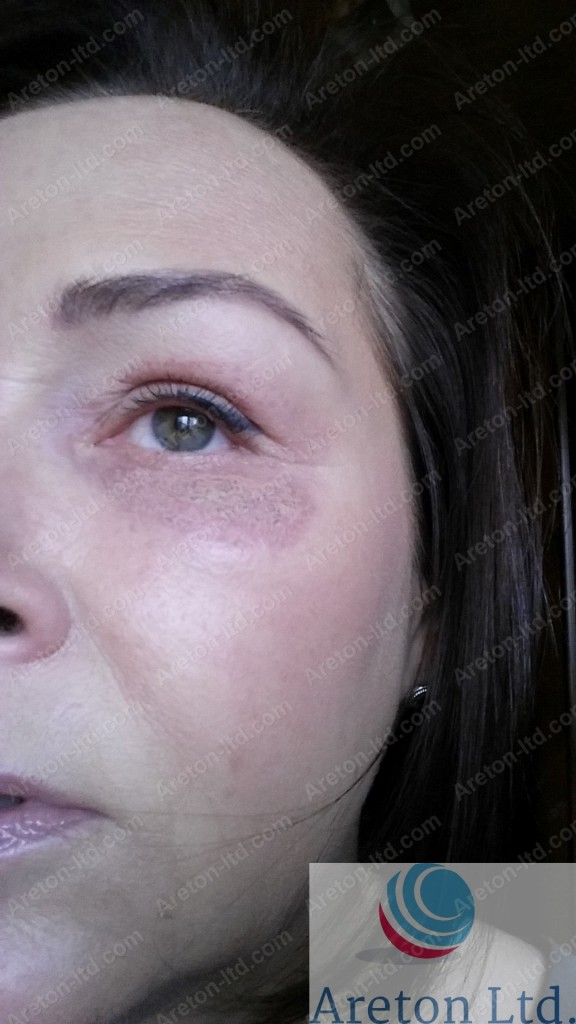
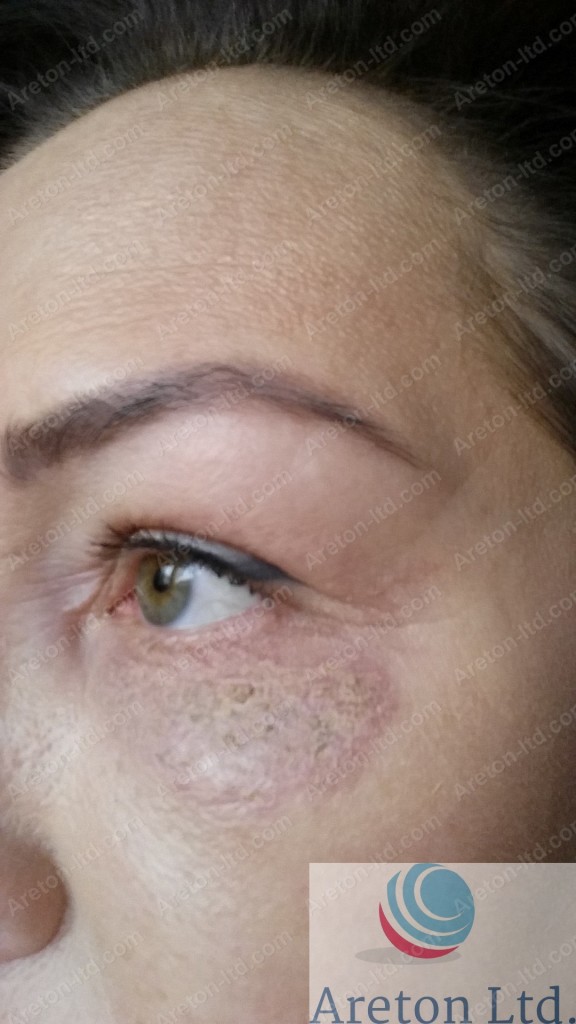
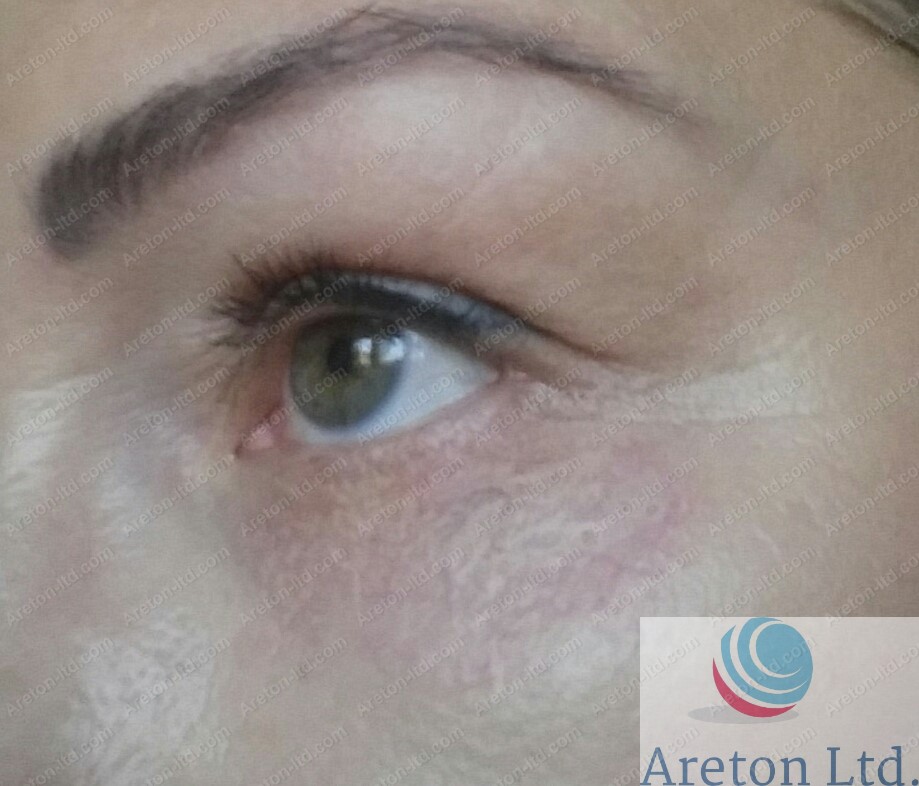
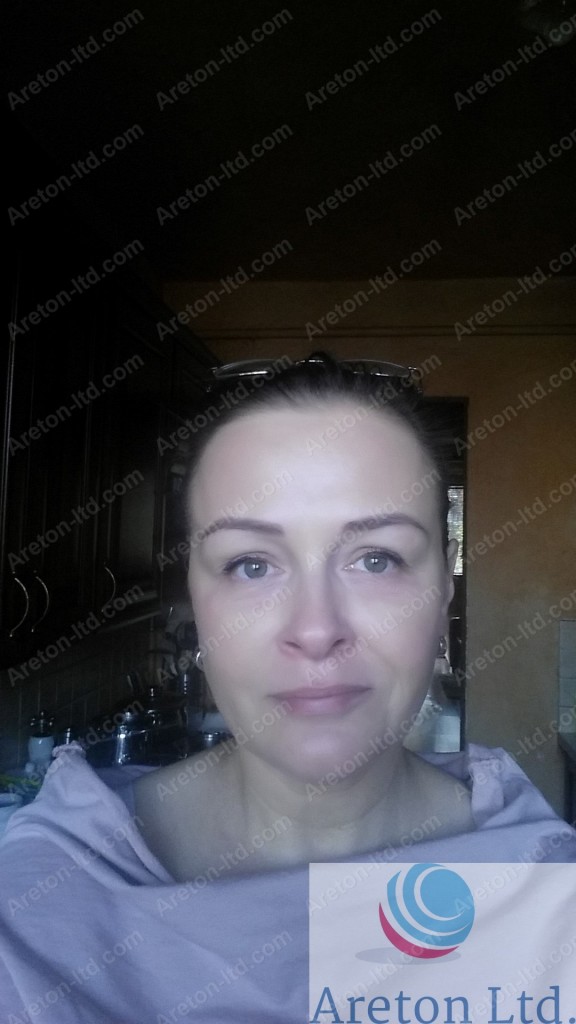
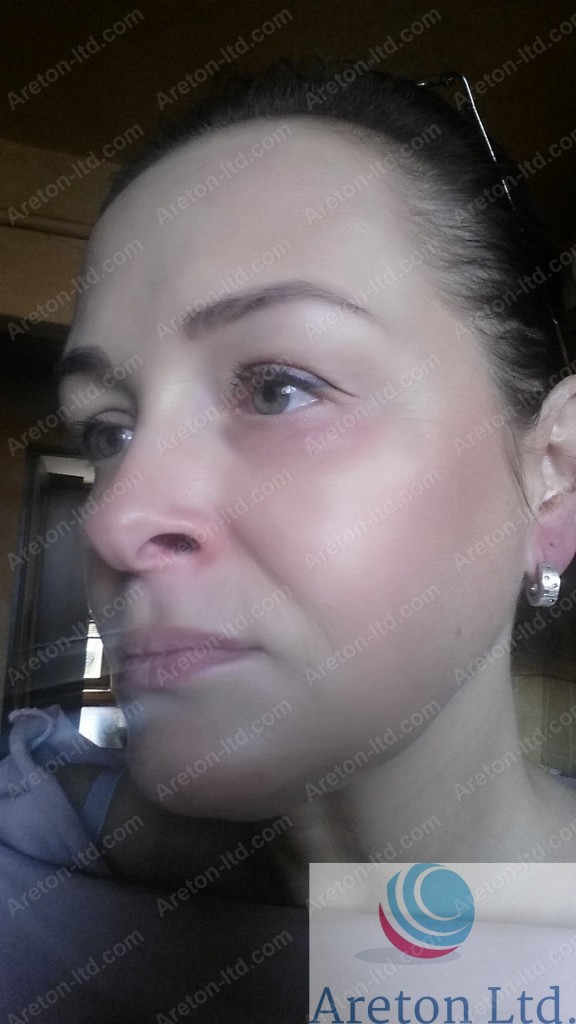
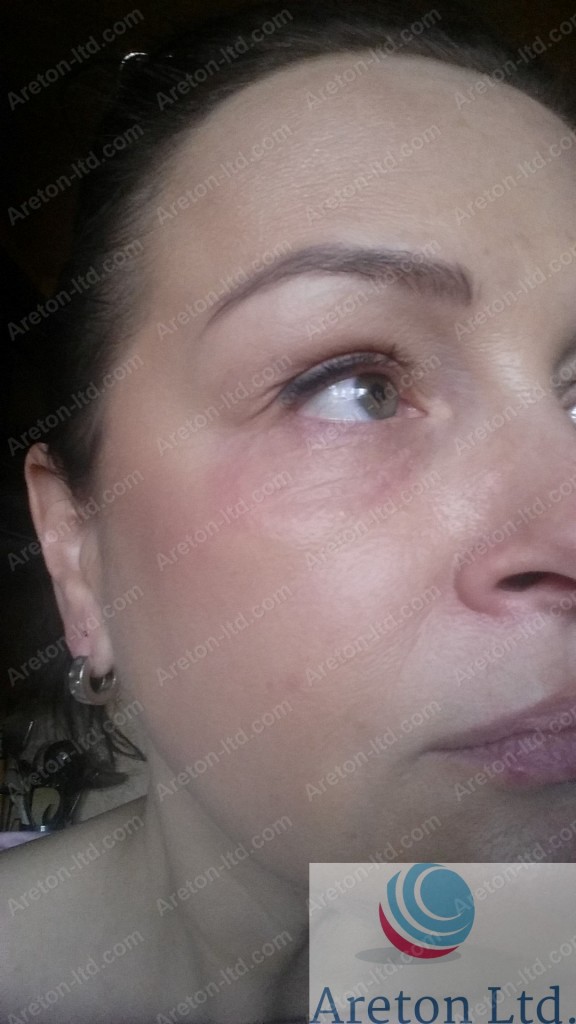
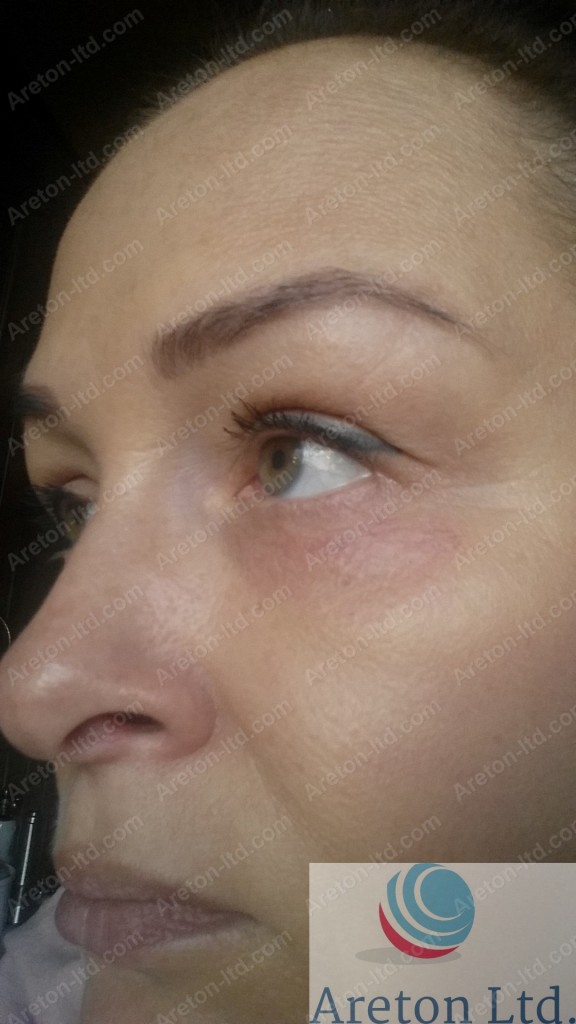
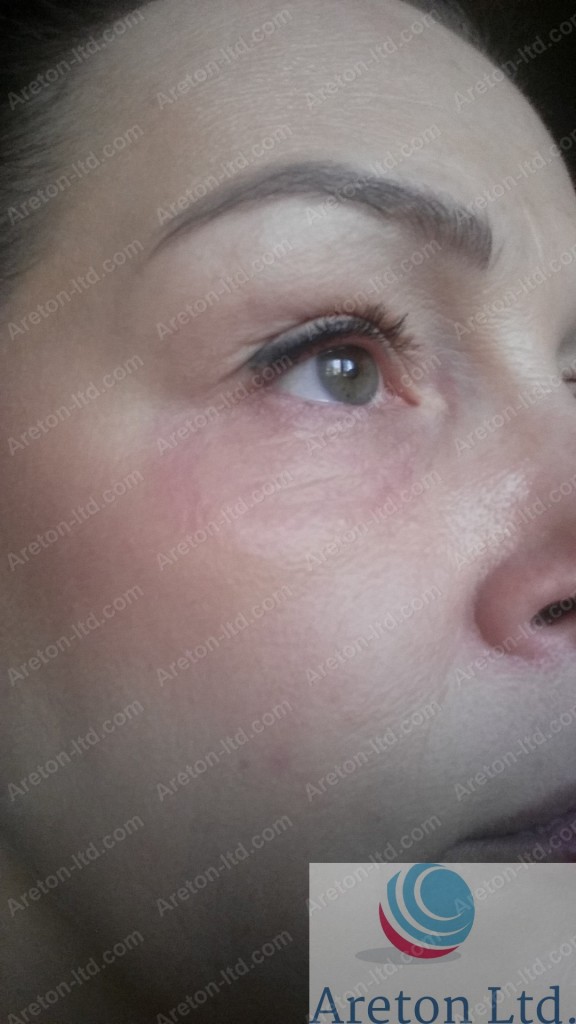
This is an example of lower eyelid stretching. This particular client underwent a stretch of the upper eyelid using voltaic plasma the day before the lower eyelid stretch treatment, described on this page. therefore, the redness and slight swelling of the upper eyelid, in the previous image, are due to the previous previous treatment of smooth eyelid lift with plasma.
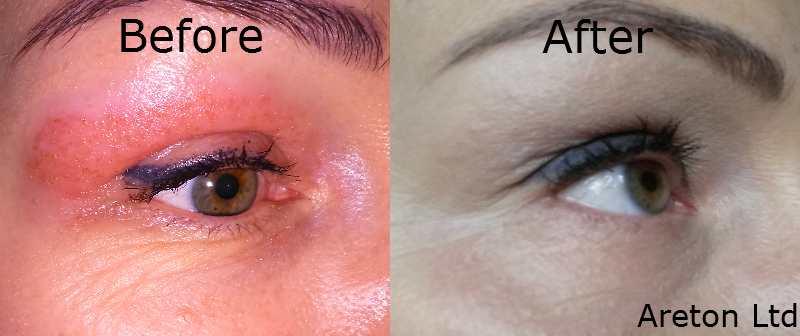
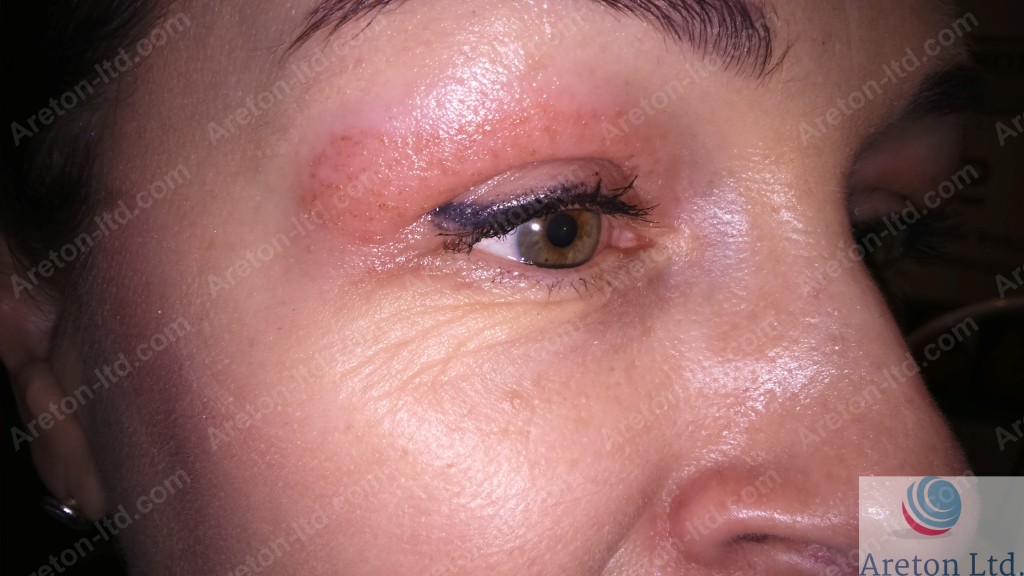
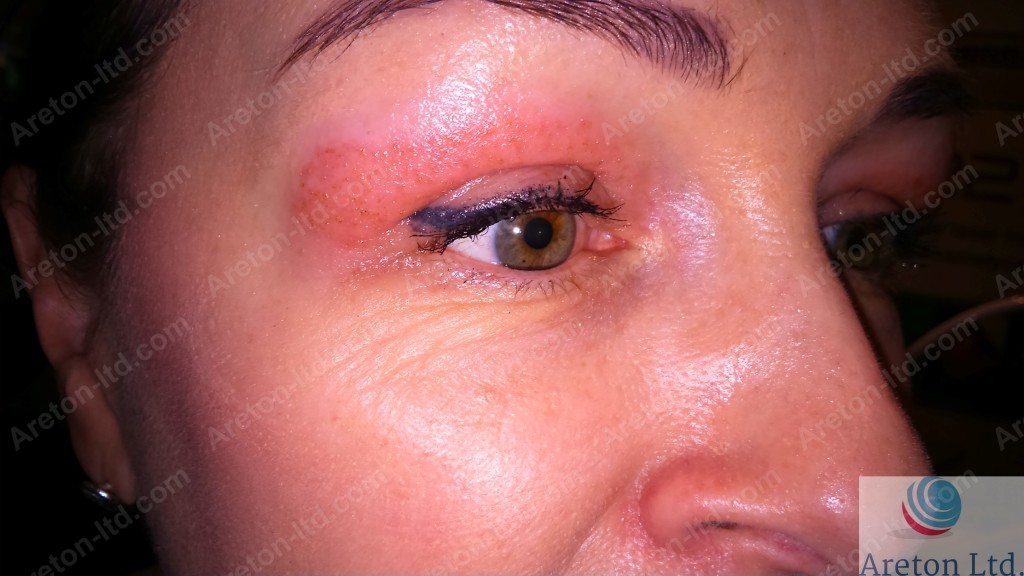
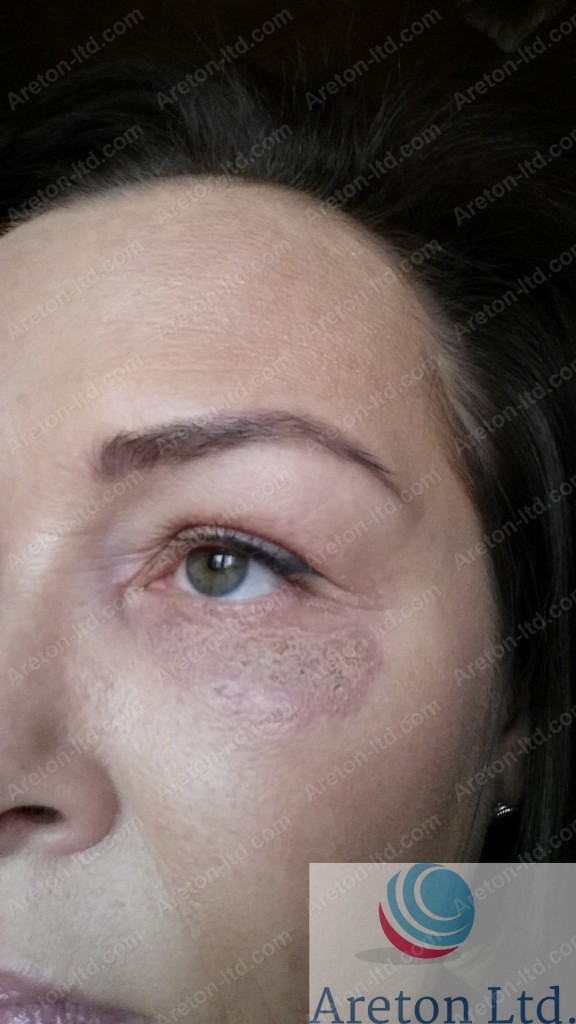
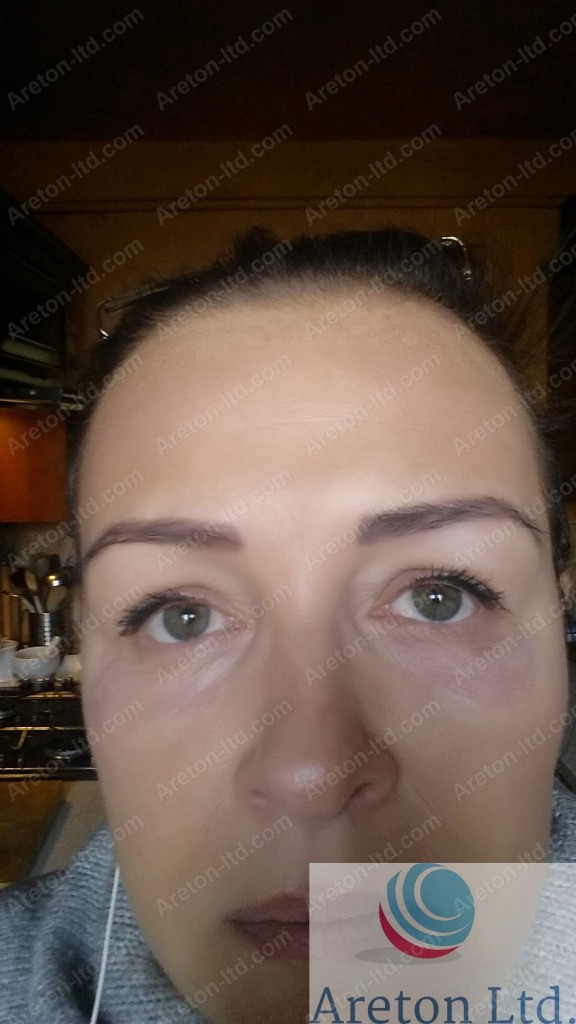
Image before and after the right lower eyelid stretch treatment.
The video showing how the procedure was carried out. You will gain an appreciation of the entire content of this page and what type of intensity treatment was carried out and how.
Below you can watch the video summarising the content in this web page. The video will show you in a few minutes:
- the before and after of each eye,
- the healing progression over the period of 7 days
- How the procedure was carried out, all the interruptions have been edited out.
You can limit yourself to watching the video in its entirety to have an overall appreciation of the content of this page. The video only lasts less than 10 minutes.
If you want to watch the fast forwarded version please click here.
The intensity used in this particular treatment is relatively high. The device setting ranged between 10 to 12. Also as you can see the duration of the spots is relatively brief (a quarter of a second to half a second). Also the distancing between the spots is between 1 to 2 mm maximum. The spots were applied as usual between the expression lines (wrinkles) and not inside them . In this case, the aesthetic practitioner (Andreas Russo MD of Areton Ltd as 2016), made sure the whole area was covered in order to achieve optimal results within the only session. Please note that the treatment can be repeated and leading to further appreciable improvement in the appearance of the lower periorbital lines.
In this case, the numbing product used was a 10% lidocain based cream . This numbing product was applied using occlusion for 45 minutes. The area was not completely numb and therefore particular attention had to be paid to the pain experienced by the client.
The use of a stronger professional topical numbing product is always recommended whenever possible. Topical numbing products containing: Lidocaine 20%, Prilocaine 5%, Tetracaine 5%. are very effective in numbing the area even without occlusion and the client does not usually experience any significant pain or discomfort during the treatment. Those who underwent these types of aesthetic procedures using this type of numbing product, reported that they still feel the zapping of the voltaic arcing bursts, however no pain or discomfort are felt during the treatment.
It is important that the client is at ease during the aesthetic treatment. Please bear in mind that it is still possible to carry out most of these types of treatment s without any numbing product, however this can make the experience of the treatment quite unpleasant. additionally in case the client is experiencing a high level of discomfort the treatment can last a lot longer, it bay become impractical to carry out the treatment at the full extent you would like.
It is recommendable to use the strongest professional numbing product possible, in order to allow
- Ease and speed of operation.
- Allow the treatment to be carried out at its full potential. In case the client experiences too much discomfort or pain, carrying out the procedure at the intensity you deem suitable for the particular case may become impractical. For example, in case the customer is particularly sensitive and the numbing product is not as effective, you may find that certain power levels cannot be practically used. For example if the customer is particularly sensitive, the lowest power levels may be tolerable while the higher power levels which you might use instead, may become not tolerable.
Therefore ensuring that the customer does not experience any pain or discomfort is very important this is done by using numbing products in the appropriate way. This is very important because it will have a repercussion on the way you will be able to work, the customer's experience and sometimes even the final results.
In the case presented the use of a stronger professional topical numbing product would have been more suitable as this would have allowed a faster operation.
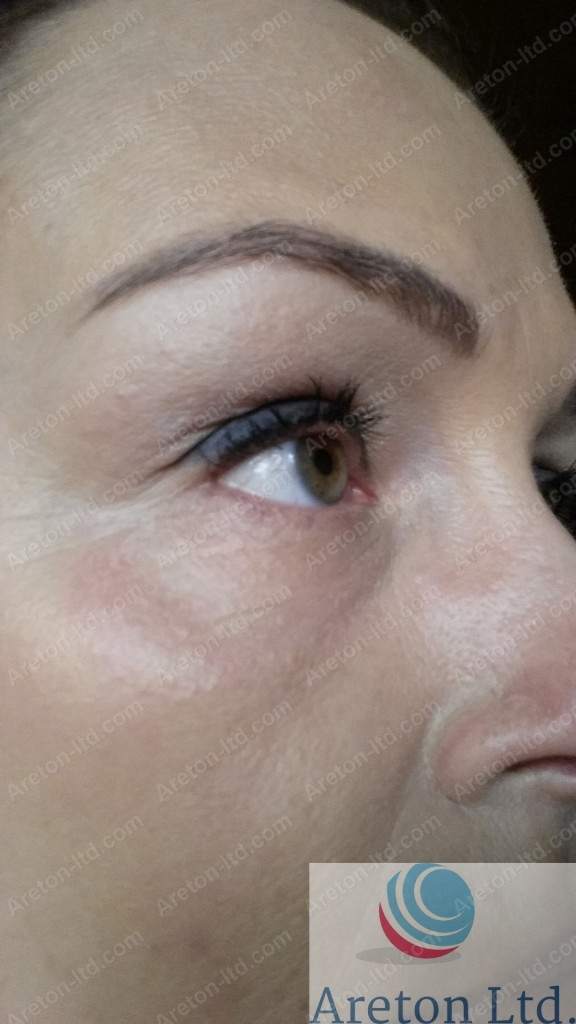
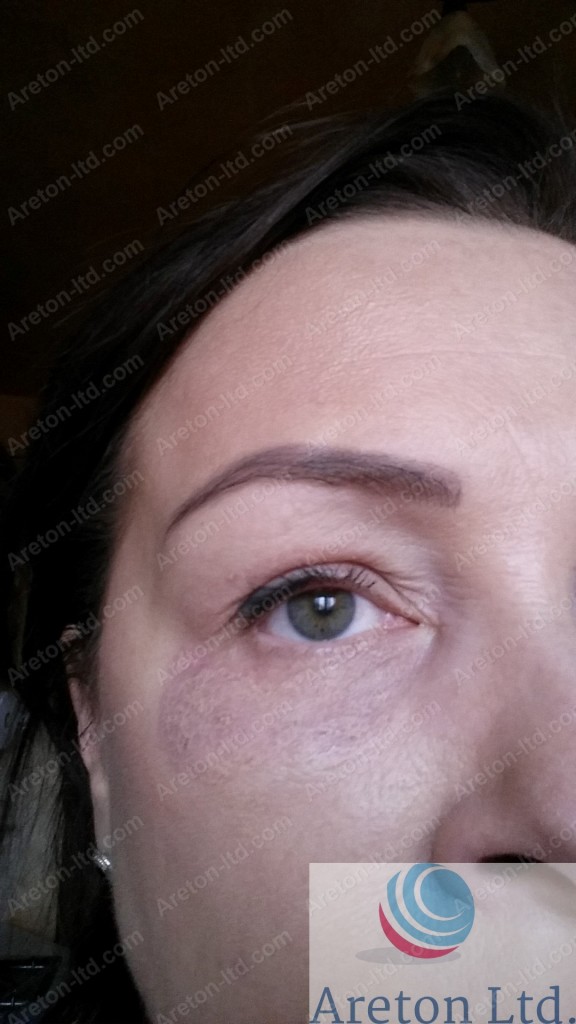
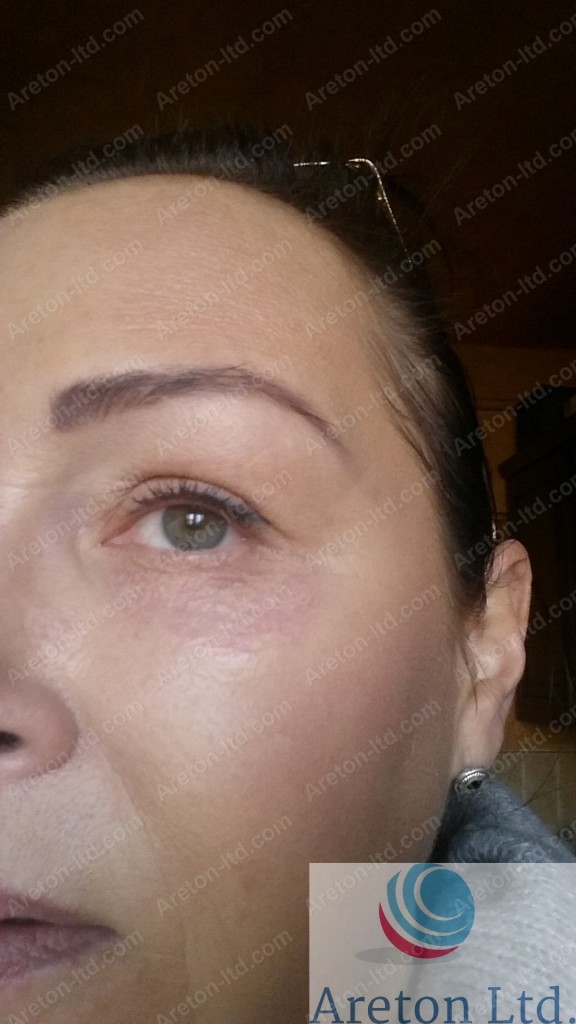
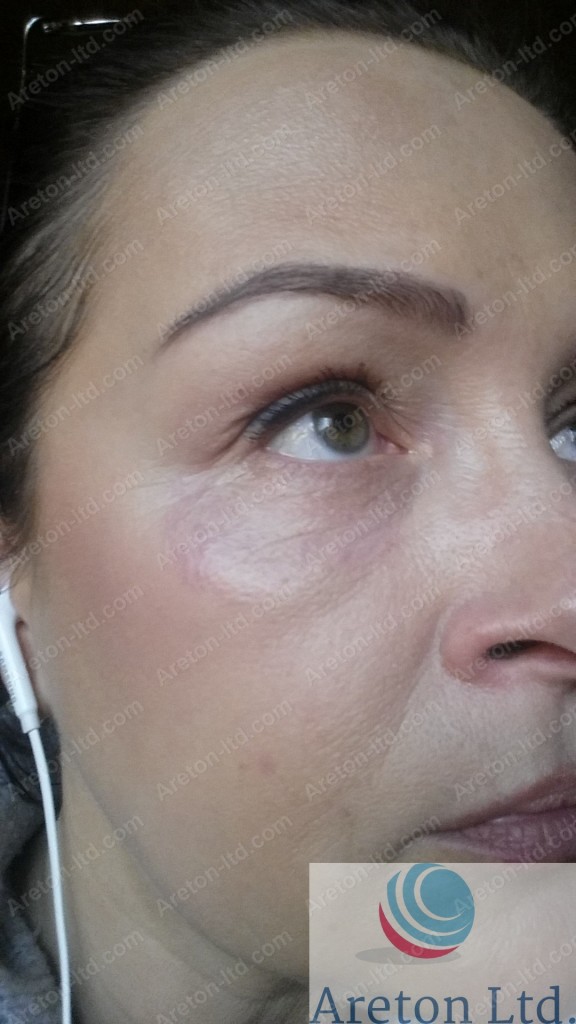
The lower periorbilal wrinkles are not caused by a smile or a facial expression at the time the pictures were taken. Although the client has a relaxed face in all the before pictures the lower periorbital wrinkles are easily visible.
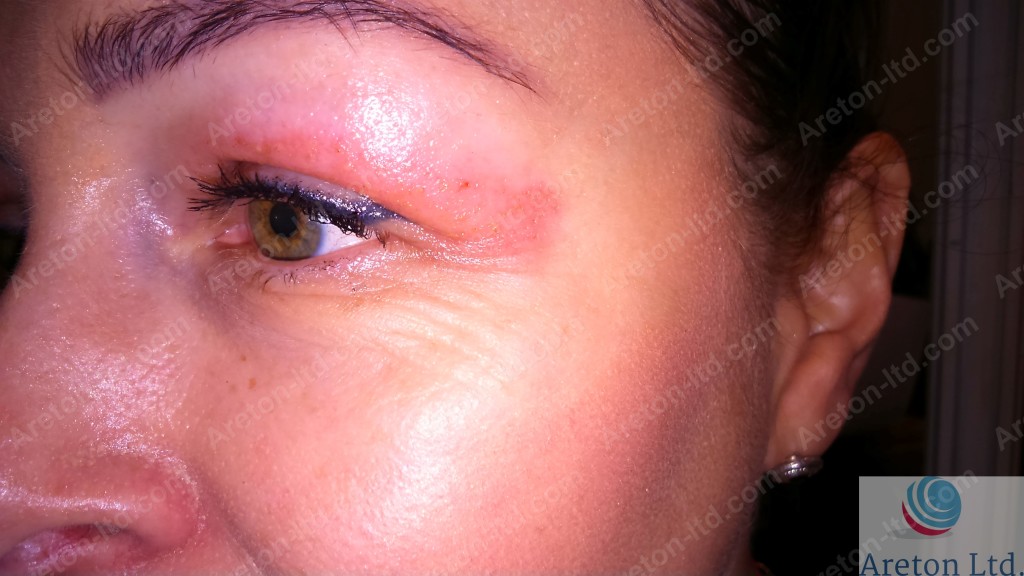
Detail of the left eye of the client. The lower eyelid wrinkles show while the face is completely relaxed. Easily treatable with voltaic plasma.
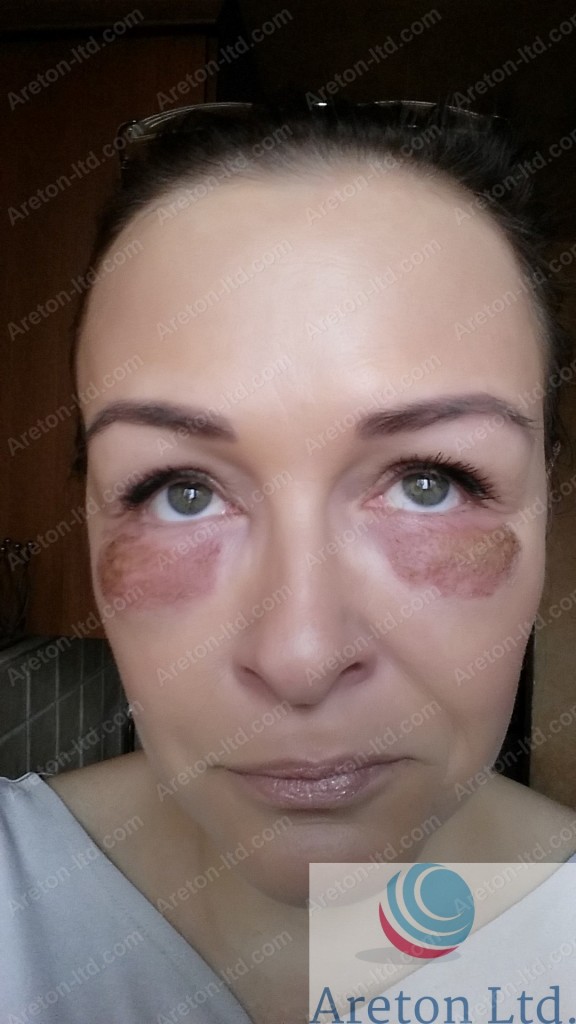
The pictures seven days after undergoing the treatment submitted by the client who underwent this aesthetic treatment.
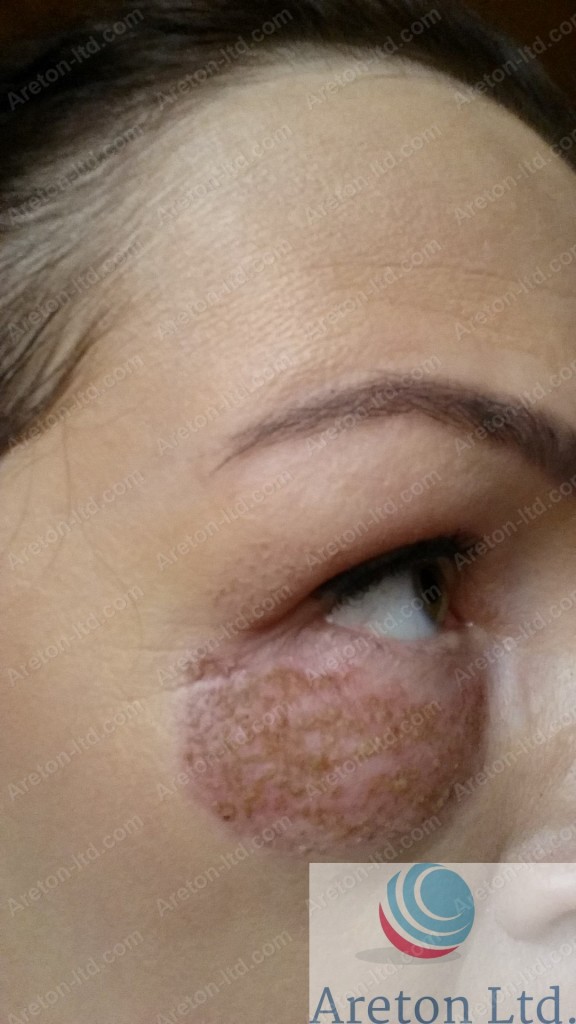
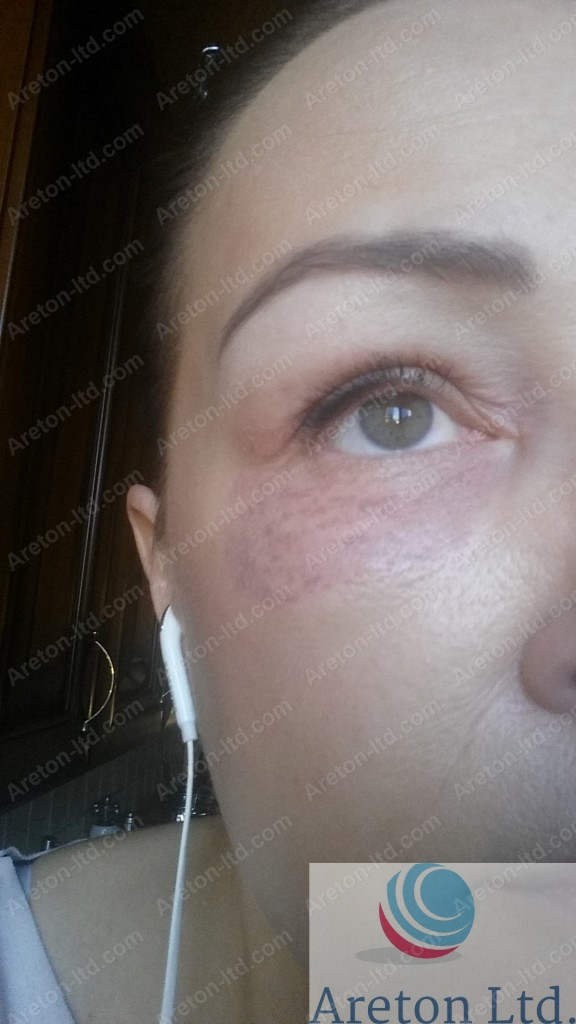
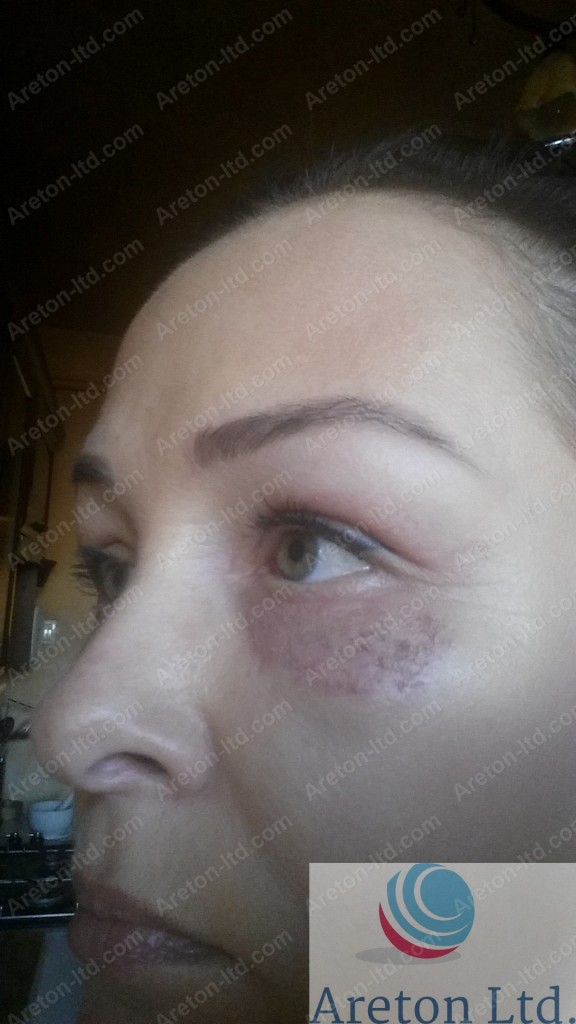
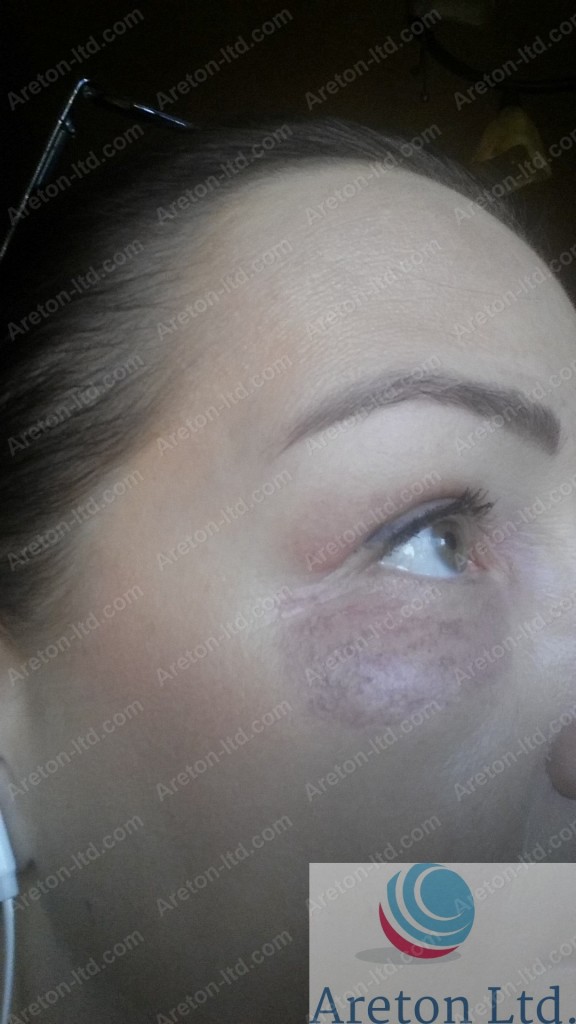
All the pictures below were taken 7 days after the treatment by the client herself.
You will learn what after-care was carried out during the healing period.
Day to day healing progression and after-care.The healing period in this case is relatively short. It lasted 7 days. The healing period depends on the area treated but most importantly, the after care.
Most of the adverse effects found after these types of aesthetic treatment seems to be associated to infections and the use of cosmetics during the treatment. For this reason in this case study the client was clearly instructed to avoid all use of cosmetics, creams, antibiotic creams, antiseptics etc. This is because the use of such products have been shown to be the main contributor to delayed healing and various long term adverse effects. The client was instructed to only wash the area as normal, twice a day with mild neutral soap.
It has been shown on a consistent basis that the simple use of mild neutral soap and water to cleanse the area had been enough to ensure a good and fast healing. This is the advise formally given to this particular client. As shown in the daily pictures submitted by the client the healing was relatively smooth and lasted only one week.
Please bear in mind that even when the scabs have fallen off the area is normally still for a while and red spots can appear where the voltaic spots were applied. In the case presented no red spots were reported. Please bear in mind that while the area is still red it usually feels slightly tender to the touch. This is when the use of total sun protection is advisable.
About the healing progression, please click on the link to jump to the relevant pictures:- Pictures of the Day One
- Pictures of Day Two
- Pictures of Day Three
- Pictures of Day Four
- Pictures of Day Five
- Pictures of Day Seven
Day one
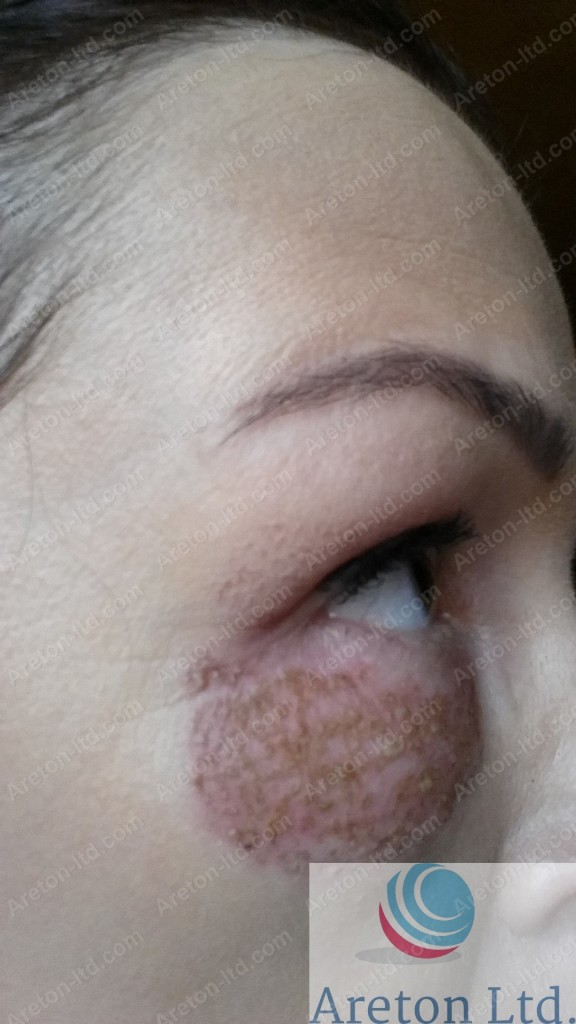
Right eye detail. The scabs ave not formed yet. The area treated is still red and slightly swollen as expected.
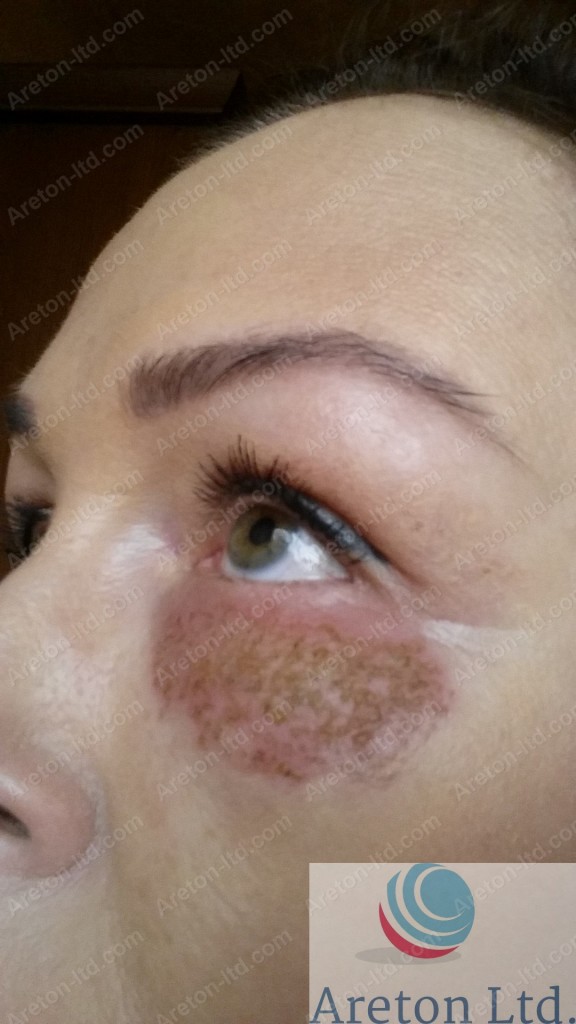
Detail of the left eye. like the right eye the area is red and slightly swollen. The voltaic arcing spots are clearly visible.
Day 2
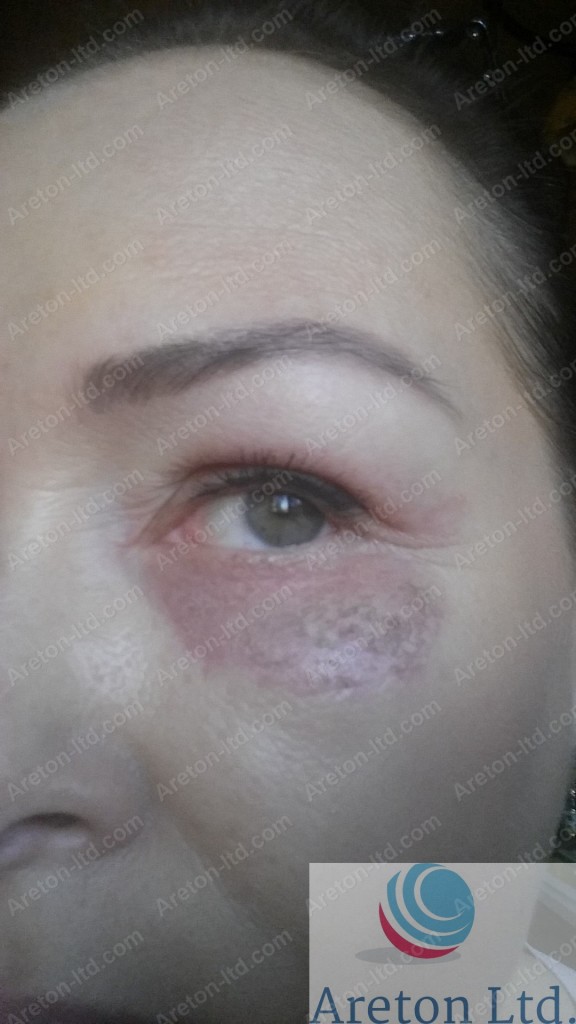
Detail of the left eye. The area is less red than the day prior. Milder swelling present than the previous day.
Day 3
Day 4
Day 5
[:es]
Este es un ejemplo de estiramiento del párpado inferior. Este cliente en particular se sometió a un estiramiento del párpado superior utilizando plasma voltaico el día anterior al tratamiento de estiramiento del párpado inferior, descrito en esta página. por lo tanto, el enrojecimiento y la leve hinchazón del párpado superior, en la imagen anterior, se deben al tratamiento previo anterior de estiramiento suave del párpado con plasma.

Imagen antes y después del tratamiento de estiramiento del párpado inferior derecho.
El video que muestra cómo se realizó el procedimiento. Obtendrá una apreciación de todo el contenido de esta página y qué tipo de tratamiento de intensidad se llevó a cabo y cómo.
A continuación puede ver el video que resume el contenido de esta página web. El video te mostrará en unos minutos:
- El antes y el después de cada ojo.
- La progresión curativa en el período de 7 días.
- Cómo se llevó a cabo el procedimiento, todas las interrupciones se han corregido.
Puede limitarse a ver el video en su totalidad para tener una apreciación general del contenido de esta página. El video solo dura menos de 10 minutos.
Si desea ver la versión de reenvío rápido. , haga clic aquí.
La intensidad utilizada en este tratamiento particular es relativamente alta. La configuración del dispositivo osciló entre 10 y 12. Además, como puede ver, la duración de los puntos es relativamente breve (de un cuarto de segundo a medio segundo). Además, el distanciamiento entre los puntos es de 1 a 2 mm como máximo. Las manchas se aplicaron como de costumbre entre las líneas de expresión (arrugas) y no dentro de ellas. En este caso, el profesional de la estética (Andreas Russo MD de Areton Ltd en 2016) se aseguró de cubrir toda el área para lograr resultados óptimos en la única sesión. Tenga en cuenta que el tratamiento puede repetirse y llevar a una mejora apreciable en la apariencia de las líneas periorbitales inferiores.
En este caso, el producto anestésico utilizado fue una crema a base de lidocaína al 10%. Este producto anestésico se aplicó mediante oclusión durante 45 minutos. El área no estaba completamente adormecida y, por lo tanto, debía prestarse especial atención al dolor experimentado por el cliente.
Siempre que sea posible, se recomienda el uso uso de un producto anestésico tópico profesional más fuerte. Productos anestésicos tópicos que contienen: Lidocaína 20%, Prilocaína 5%, Tetracaína 5%. son muy efectivos para adormecer el área incluso sin oclusión y el cliente generalmente no experimenta ningún dolor o malestar significativo durante el tratamiento. Aquellos que se sometieron a este tipo de procedimientos estéticos con este tipo de producto para adormecer, informaron que todavía sienten el ruido de las explosiones de arco voltaico, sin embargo, no se siente dolor ni molestia durante el tratamiento.
Es importante que el cliente se sienta cómodo durante el tratamiento estético. Tenga en cuenta que todavía es posible llevar a cabo la mayoría de estos tipos de tratamientos sin producto anestésico, sin embargo, esto puede hacer que la experiencia del tratamiento sea bastante desagradable. Además, en caso de que el cliente experimente un alto nivel de incomodidad, el tratamiento puede durar mucho más tiempo, por lo que puede resultar poco práctico llevar a cabo el tratamiento en la medida en que lo desee.
Es recomendable utilizar el producto anestésico profesional más fuerte posible, para permitir
- Facilidad y rapidez de funcionamiento.
- Permitir que el tratamiento se lleve a cabo en todo su potencial. En caso de que el cliente experimente demasiada incomodidad o dolor, llevar a cabo el procedimiento a la intensidad que considere adecuada para el caso particular puede resultar poco práctico. Por ejemplo, en caso de que el cliente sea particularmente sensible y el producto para adormecer no sea tan efectivo, es posible que ciertos niveles de potencia no puedan usarse en la práctica. Por ejemplo, si el cliente es particularmente sensible, los niveles de potencia más bajos pueden ser tolerables, mientras que los niveles de potencia más altos que puede usar en su lugar, pueden volverse no tolerables.
Por lo tanto, asegurarse de que el cliente no experimente ningún dolor o incomodidad es muy importante, esto se hace mediante el uso de productos anestésicos de la manera adecuada. Esto es muy importante porque tendrá una repercusión en la forma en que podrá trabajar, la experiencia del cliente y, a veces, incluso los resultados finales.
En el caso presentado, el uso de un producto anestésico tópico profesional más fuerte hubiera sido más adecuado ya que esto hubiera permitido una operación más rápida.
Las arrugas periorbilal inferiores no son causadas por una sonrisa o una expresión facial en el momento en que se tomaron las imágenes. Aunque el cliente tiene una cara relajada en todas las imágenes anteriores, las arrugas periorbitales inferiores son fácilmente visibles.

Detalle del ojo izquierdo del cliente. Las arrugas del párpado inferior se muestran mientras la cara está completamente relajada. Fácilmente tratable con plasma voltaico.
Las imágenes siete días después de someterse al tratamiento presentado por el cliente que se sometió a este tratamiento estético.
Todas las fotos a continuación fueron tomadas 7 días después del tratamiento por la propia cliente..
Aprenderá qué Post tratamiento se llevaron a cabo durante el período de curación.
Día a día de la curación de la progresión y el postratamiento.El período de curación en este caso es relativamente corto. Duró 7 días. El período de curación depende del área tratada, pero lo más importante es el post tratamiento.
La mayoría de los efectos adversos encontrados después de estos tipos de tratamiento estético parecen estar asociados a infecciones y al uso de cosméticos durante el tratamiento. Por este motivo, en este estudio, se indicó claramente al cliente que evitara el uso de cosméticos, cremas, antibióticos, antisépticos, etc. Esto se debe a que se ha demostrado que el uso de dichos productos es el principal contribuyente a la cicatrización tardía y diversos tratamientos a largo plazo. efectos adversos. Se le indicó al cliente que solo lave el área con normalidad, dos veces al día con jabón neutro suave.
Se ha demostrado de manera consistente que el simple uso de un jabón neutro suave y agua para limpiar el área ha sido suficiente para garantizar una curación buena y rápida. Este es el consejo dado formalmente a este cliente en particular. Como se muestra en las fotos diarias enviadas por la cliente, la curación fue relativamente suave y duró solo una semana.
Por favor, tenga en cuenta que incluso cuando las costras se han caído del área, normalmente permanece inmóvil durante un tiempo y pueden aparecer manchas rojas donde se aplicaron las manchas voltaicas. En el caso presentado no se reportaron manchas rojas. Por favor, tenga en cuenta que mientras el área sigue siendo roja, generalmente se siente ligeramente sensible al tacto. Esto es cuando el uso de protección solar total es aconsejable.
Acerca de la progresión de la curación, haga clic en el enlace para saltar a las imágenes relevantes:- Fotos del primer día
- Fotos del día dos
- Fotos del día tres
- Fotos del día cuatro
- Fotos del día cinco
- Fotos del día siete
Día uno

Detalle del ojo derecho. Las costras aún no se han formado. El área tratada todavía está roja y ligeramente hinchada como se esperaba.

Detalle del ojo izquierdo. Al igual que el ojo derecho, el área es roja y ligeramente inflamada. Las manchas de arco voltaico son claramente visibles.
Día Dos
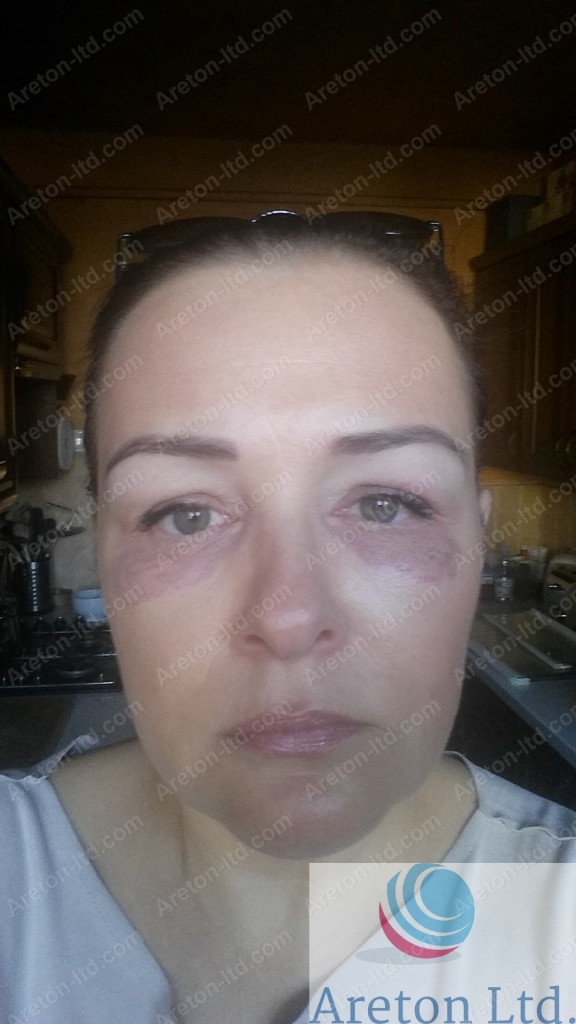
El área sigue siendo roja, pero el enrojecimiento ha disminuido ligeramente. La hinchazón casi se ha ido.

Detalle del ojo izquierdo. El área es menos roja que el día anterior. Hinchazón más leve presente que el día anterior.
Día 3
Día 4
Día 5
[:]

